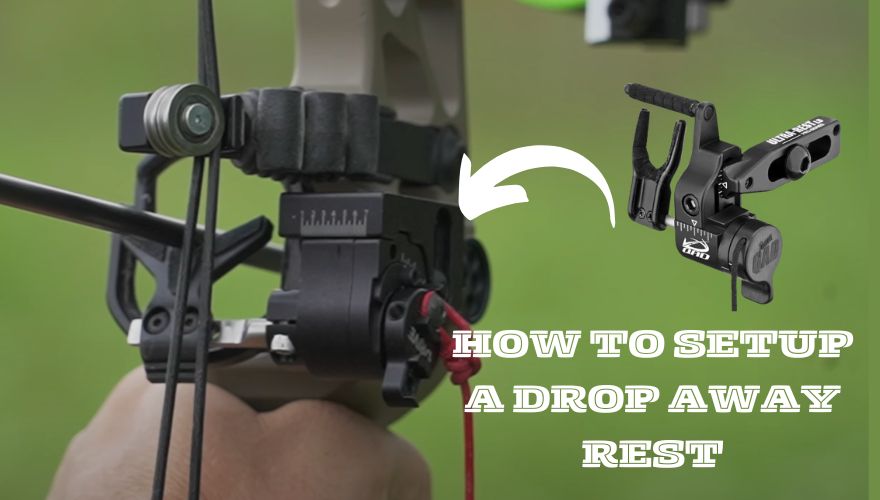
For an archer having the right equipment is crucial for precision and accuracy. One such essential piece of gear is the drop-away arrow rest. It is a type of arrow rest that holds the arrow before the release and as the bow string is released it drops down to let arrow fly by easily.
This little component can help boost arrow flight and accuracy. This comprehensive guide will take you through the process of setting up and installing a drop-away arrow rest, ensuring your arrows fly straight and true every time you release.
Choosing the Right Drop Away Rest
Drop-away arrow rests are available in two main types: cable-driven and limb-driven. Each type operates differently and offers distinct advantages. Let’s take a closer look at both types:
1. Cable-Driven Drop-Away Arrow Rest
Basic Functionality: The cable-driven drop-away arrow rest uses a control cable attached to the bow’s down cable. When the bow is drawn, the control cable pulls the rest’s launcher arm upward, supporting the arrow in its initial position.
Rest Activation: As the bowstring is released, the control cable relaxes, allowing the launcher arm to drop away rapidly. This sudden movement creates a clear path for the arrow, ensuring minimal contact during the shot and reducing fletching interference.
Advantages: The cable-driven rest is known for its simplicity and ease of installation. It requires minimal tuning and adjustments to achieve consistent arrow clearance and accuracy. This simplicity makes it beginner friendly
2. Limb-Driven Drop-Away Arrow Rest
Basic Functionality: The limb-driven drop-away arrow rest operates using a cord attached to either the top or bottom limb of the bow. As the bow is drawn, the cord tension holds the rest’s launcher arm in the upright position, supporting the arrow.
Rest Activation: Upon releasing the bowstring, the cord’s tension is released, allowing the launcher arm to drop away quickly and silently. This swift movement provides ample clearance for the arrow, promoting improved accuracy.
Advantages: The limb-driven rest is favored for its ability to offer a smoother and quieter drop-away action. It is also less reliant on external cables, making it an appealing choice for some archers.
Both types of drop-away arrow rests are designed to minimize arrow contact with the rest during the shot, reducing interference and enhancing shooting accuracy. Depending on individual preferences and shooting styles, archers can choose between cable-driven and limb-driven rests to improve their performance in their archery endeavors.
How to Set up the Cable-Driven Drop Away Arrow Rest
When it comes to setting up a cable-driven drop-away arrow rest, precision and attention to detail are key. Follow these step-by-step instructions to ensure a smooth and accurate installation.
1. Attach The Rest to the Riser
The first step in setup is to mount the rest on the riser with the help of bolts. Locate the mounting holes on the riser of your compound bow. These holes are typically found on the side of the riser opposite the sight window.
Align the arrow rest with the mounting holes and attach it securely using the provided screws or bolts. After installing the rest, now you can make adjustments to the height (vertical adjustment) and width (horizontal adjustment). Make sure the rest is positioned in a way that allows for easy arrow clearance and proper alignment with the bowstring.

2. Adjusting the Centre Shot and nocking point
The center shot refers to the alignment of the arrow rest with the bowstring. After installing the arrow rest, nock an arrow and look at the vertical and horizontal distance of the arrow with the bow.
Height adjustment: Nock the arrow on the string, with its shaft on the rest in a raised position. Compare the angle of the arrow shaft with the upper part of the grip to see if they are parallel or not. If they are then your height is already adjusted, but if the arrow is pointed upward or downward, move the rest a bit down or up respectively until the arrow is parallel to the arrow shelf.

Windage adjustment: Nock an arrow on the bowstring, and shaft of the arrow placed on the rest in the raised position. Compare the shaft’s angle with the riser. They should both be parallel to each other. Use a bow square or a laser center-shot tool to ensure the arrow rest is aligned horizontally with the center of the bowstring.
Make any necessary adjustments to the rest position to achieve the desired center shot alignment. After the center shot is aligned, tighten the mounting screws.
3. Attaching the Draw Cord to the Cable
drop away arrow rests come with a draw cord that is used to activate the rest during the shooting process. This cord is typically attached to the cable of the bow. Tie the draw cord securely to the cable using a reliable knot. Ensure the draw cord is placed roughly one and a half inch below the bottom of the rest.
How to tie a draw cord
Method 1: Football Clamp Attachment
- Attach the Clamp: Many arrow rests come with small football-shaped clamps at the end of the draw cord. Position the clamp around the bow cable at the desired location, ensuring it securely holds the cord.
- Adjust the Cord: With the clamp in place, draw the bow and observe the timing of the rest. The draw cord should not pull against the bow’s down cable at full draw.
- Secure the Clamp: Once you’re satisfied with the placement, tighten the clamp screw completely to firmly secure the draw cord in place.

Method 2: Double-Half Hitch Knot
- Tie the Knot: Alternatively, you can use a double-half hitch knot to attach the draw cord to the bow’s cable. Wrap the cord around the bow cable and pass it through the loop, creating a simple knot.
- Position and Adjust the Cord: Slide the knot to the desired location on the cable, approximately one inch below the bottom of the rest. Leave about two inches of slack to accommodate adjustments.
- Serving for Security: To enhance the knot’s security, add serving above and below it. This prevents the knot from shifting during use and ensures a reliable connection.

Method 3: Through-the-Cable Attachment (Recommended)
- Prepare the Cord: For this method, you will need a bow press to relieve tension in the bow. Pass the draw cord through the cable, creating a loop on the other side.
- Position and Adjust the Cord: Position the looped cord approximately one inch below the bottom of the drop-away rest, leaving two inches of slack for adjustments.
- Tighten the Cord: Tighten the cord until the launcher arm is in the desired position for proper timing.
- Secure with Serving: To prevent any movement, add serving above and below the looped cord, securing it firmly in place.

4. Timing the Arrow Rest
Timing the arrow rest involves ensuring that it activates and drops away at the correct moment during the shot cycle.
When reaching the full draw, there should be some movement in you arrow rest, it should activate and fall just a bit, but not all. If there is no movement when reaching full draw, lengthen the slack a bit, so it activates just at the moment you reach full draw.
With the bow at full draw, observe the movement of the arrow rest as you release the bowstring. The rest should drop away smoothly and without any interference with the arrow. If the rest drops too late (after you release the bowstring), you should lengthen the slack in the draw cord. Adjusting the slack in the draw cord allows you to fine-tune the timing of the rest’s drop-away action.
When you have perfectly timed your arrow rest, cut the slack. Then use a lighter to melt the edge of the draw cord and push it against the lighter or something else to expand its shape so it doesn’t break or untie.
5. Tuning the Arrow Rest
Once the rest is installed and timed correctly, it is important to fine-tune. If your arrows are still making contact with the rest after releasing, then adjust your timing again until the arrow leaves the rest smoothly.
Perform a paper tuning test by shooting arrows through a sheet of paper or a paper tuning device. This will help identify any inconsistencies in arrow flight and indicate adjustments that need to be made.
With the bow drawn, ensure that the draw cord is not pulling against the down cable at full draw. There should be no strain in the down cable where the draw cord is connected.
For more details on cable driven drop away rests you can check out these in depth instructions.
How to set up the Limb-Driven Drop Away Arrow Rest
Installing a limb-driven drop-away arrow rest is an equally important process that demands attention to detail. Follow these steps to ensure a successful installation of this type of arrow rest. The initial steps are the same as for cable driven drop away rest.
1. Mount the Rest
Begin by securely attaching the limb-driven drop-away arrow rest to the riser of your bow. Use the provided screws and washers to fasten the rest, ensuring it aligns perfectly with the arrow shelf. Take care not to over-tighten the screws, as it may lead to misalignment or damage.
2. Adjust the Rest’s Height
Proper positioning of the rest is crucial for accurate shooting. Ensure that the launcher arm is positioned to hold the arrow level. This is the same step as adjusting height in the cable drop arrow rest.
To make height or nocking point adjustments, begin by positioning the arrow on the string and lifting the rest. Check whether the angle of the arrow shaft aligns with the upper part of the grip. If they are parallel, your height is already set correctly. However, if the arrow points upward or downward, make slight adjustments to the rest by moving it up or down until the arrow becomes parallel with the arrow shelf. Use a level to verify that the rest aligns precisely with the bow’s riser.
3. Set the Center shot
Achieving the correct center shot alignment is essential for improved arrow accuracy and flight. Adjust the rest’s horizontal position to center the arrow on the bowstring.
For windage adjustments, start by nocking an arrow on the bowstring and placing the arrow’s shaft on the elevated rest. Examine the angle of the shaft in comparison to the riser, aiming for parallel alignment. To ensure precise horizontal alignment, use either a bow square or a laser center-shot tool to confirm that the arrow rest is centered with the bowstring.
Using an arrow level or a bow square, make small adjustments until the arrow is perfectly centered.
4. Attach the Draw Cord to the Top or Bottom Limb
For limb-driven rests, a draw cord activates the drop-away function. Carefully follow the manufacturer’s instructions to attach the draw cord to either the top or bottom limb of the bow.
Take the cord and melt its edge and deform it by pressing it against a riser. Then move it between the space on the limbs and tie a double half hitch knot on one side of the limbs. Refer to the video below to learn how to tie this knot). When the knot is tightly secured, grab the other end of the cord and attach it to the rest. Pull the cord until the launcher hits the stopper or touches the bottom of the rest. Ensure that it is securely fastened and has appropriate tension. Make sure the cord is not too tight that it pulls the limb or drops the rest so hard that it has a chance of damage.

5. Time the Arrow Rest and Make Adjustments
Draw the bow and observe the movement of the launcher arm. At full draw, the arm should raise up and securely hold the arrow. As you let down, the arm should immediately begin to drop away. Adjust the length of the cord as needed to achieve perfect timing. Having a friend observe the timing can aid in achieving precise adjustments. To make changes, tighten or loosen the draw cord with the screw on the rest.
If you want the launcher to drop late after releasing the bowstring or raise up late during the draw, lengthen the cord by loosening the screw holding it. Shorten the cord for reverse results.
6. Fine-Tune and Paper Tune
Once the rest is set up, fine-tune its position and timing to achieve straight arrow flight. Shoot a few arrows to test if they are leaving the rest without contact and are hitting the target. If there are contact issues, then adjust your rest’s timing.
Perform paper tuning to identify any arrow flight issues. Make slight adjustments to the draw cord tension to attain the desired arrow flight. Remember that even minor adjustments can significantly impact accuracy, so take your time during this process.
Tips For Setting Up a Drop Away Rest
The biggest tip I will give you is that after all the long and hard work of setting your arrow rest, do yourself a favour of grabbing a sharpie and marking all your settings on the bow and the rest. Make a mark on every thing that can be adjusted like the height, windage, position on cables etc. This will save you a lot in the future. Imagine if your bow gets damaged or your arrow rest gets slammed somewhere and looses its settings before an important event, you will have all your settings marked. This way you can set it up in 5 mins and save yourself.
The next tip would be to periodically check and maintain your drop-away rest. Check for loose screws or any signs of wear and tear, and make necessary repairs or replacements. This will make sure that you stay safe and your arrows hit the target consistently.
Troubleshooting Drop-Away Arrow Rest Issues
Lets discuss some common problems archers face while setting up their drop away arrow rests.
1. Why are my fletchings hitting my drop-away rest?
If your fletchings are hitting your drop-away rest, it can negatively impact arrow flight and accuracy. Several factors may contribute to this issue:
a) Incorrect Center Shot: Ensure that the center shot aligns properly with the bowstring. Make sure your arrow is straight and parallel to the riser. It shouldn’t be deflected or at an angle to the riser or as recommended by the bow manufacturer. Adjust the horizontal block on the rest to fine-tune the center shot if necessary.
b) Incorrect Nocking Point: Check the height of your nocking point or D-loop. If it is too high or too low, it can cause the arrow to contact the rest during the shot. Adjust the vertical block on the rest to level the arrow from the nock to the rest.
c) Incorrect Rest timing: If the rest’s launcher arm is too high or too low, it can lead to fletching contact. Adjust the rest’s timing to provide arrow clearance during the shot.
2. Drop-away rest not dropping
If your drop-away rest fails to drop properly after the shot, it can affect arrow clearance and accuracy. Here are some troubleshooting steps to address this issue:
a) Inspect Timing Cord: Check the timing cord that activates the rest during the shot. Ensure it is properly connected and not frayed or damaged. If needed, adjust the cord’s length to achieve proper timing.
b) Check Launcher Arm Clearance: Ensure that the launcher arm moves freely and is not obstructed by any debris or foreign objects. Clean the rest and lubricate moving parts if required.
c) Verify Rest Activation: Draw the bow and pay close attention to the timing of the rest during the shot. The launcher arm should drop away smoothly and promptly upon release. If it doesn’t, adjust the draw cord tension accordingly.
Remember to make adjustments in small increments and test the rest after each change. Properly troubleshooting and resolving drop-away rest issues will lead to improved arrow clearance and more accurate shots during your archery sessions.
FAQs
How does a drop away rest work?
A drop-away rest is a device used in archery to support the arrow before and during the shot, but it drops away as the arrow is fired, allowing for unhindered arrow flight. It works by holding the arrow in place while you draw the bow, and as you release the string, the rest drops away, providing clearance for the arrow.
Do you need a bow press to install a drop away rest?
You typically do need a bow press to install a drop-away rest. A bow press is used to relieve tension on the bowstring and cables, making it easier to attach and adjust the rest properly.
Which is better whisker biscuit or drop away?
Choose a whisker biscuit for simplicity and reliability during hunting. Opt for a drop-away rest for improved accuracy in target shooting. The better choice depends on your specific needs and preferences. Check the complete comparison in detail.
Conclusion
A drop-away arrow rest can significantly improve your archery accuracy and overall shooting experience. By following this comprehensive guide, you can confidently set up and install your drop-away rest for your best performance. If you are not a big fan of drop away arrow rests, then you might be interested in knowing the advantages of whisker biscuit, drop away rest’s arch enemy. Remember to practice regularly and experiment with different settings to find what works best for you.